Mostrando entradas con la etiqueta tutorial. Mostrar todas las entradas

jueves, 21 de junio de 2012

Bombshell sarong skirt/falda: Variation/Variación

Estoy muy contenta de enseñaros mi segundo tutorial. Desde que hice mi primer tutorial para la Sew Grateful Week he querido hacer algún otro, pero no tenía nada nuevo que enseñaros. Mi pequeño descubrimiento del martes es la excusa perfecta para jugar un poco. Mis conocimientos de Photoshop son muy básicos, así que esta vez he usado PicMonkey, y me ha encantado, además es gratis. Este es un pequeño tutorial sobre la variación de la falda del vestido Bombshell. Espero que os sea útil. He intentado hacerlo lo más corto posible para que no sea muy aburrido. Si me he olvidado de algún paso que creáis importante no dudéis en decírmelo.
I'm very happy to show you my second tutorial. Since I made my first tutorial for the Sew Grateful Week I've been wanting to make another one, but I didn't have anything new to show you. My little discovery last Tuesday is the perfect excuse to play a little. My Photoshop skills are very basic, so this time I've used PicMonkey, and I've loved it, besides it's free. This is a petite tutorial about the variation of the skirt of the Bombshell dress. I hope it's useful. I've tried to make it the shortest I could so that it isn't very boring. If I had missed any step you think is important, don't hesitate to tell me.


viernes, 6 de abril de 2012

Moon Munkie Mistery Make: Notebooks/Libretas


Ya sabéis que hace poco recibí mi paquete de Moon Munkie que gané en el organizado por Seeks de The Seek Speaks. Entre todas la cosas había unos trozos de papel de regalo en forma de corazón y de cuadrado, y una hoja con dibujos antiguos. Encontré por ahí un calendario que íbamos a tirar, y se me ocurrió reciclarlo de una manera diferente. Para hacer esto necesitas:
  • Trozos de papel de regalo ganados en el Moon Munkie (puedes utilizar trozos de papel de regalo que vayas a tirar).
  • Un calendario viejo o papeles para reciclar en los que todavía se pueda escribir, o un cuadernillo de notas de propaganda.
  • Pegamento y tijeras.
  • Aguja y una hebra de lana.
  • Un día de lluvia aburrido.
You know that I recently recieved my package of the Moon Munkie that I won in the one organized by Seeks from The Seeks Speak. Between all the things there were some pieces of gift paper, heart and square shaped and a paper with antique drawings. I found a calendar we were going to throw away and I thought about recycling in a different way. To make this you need:
  • Gift paper, heart and square shaped won from the Moon Munkie (you can use pieces of gift paper you're throwing away.
  • An old calendar or paper for recycling, or an advertising notebook.
  • Stick glue and scissors.
  • Needle and wool thread.
  • A boring rainy day.

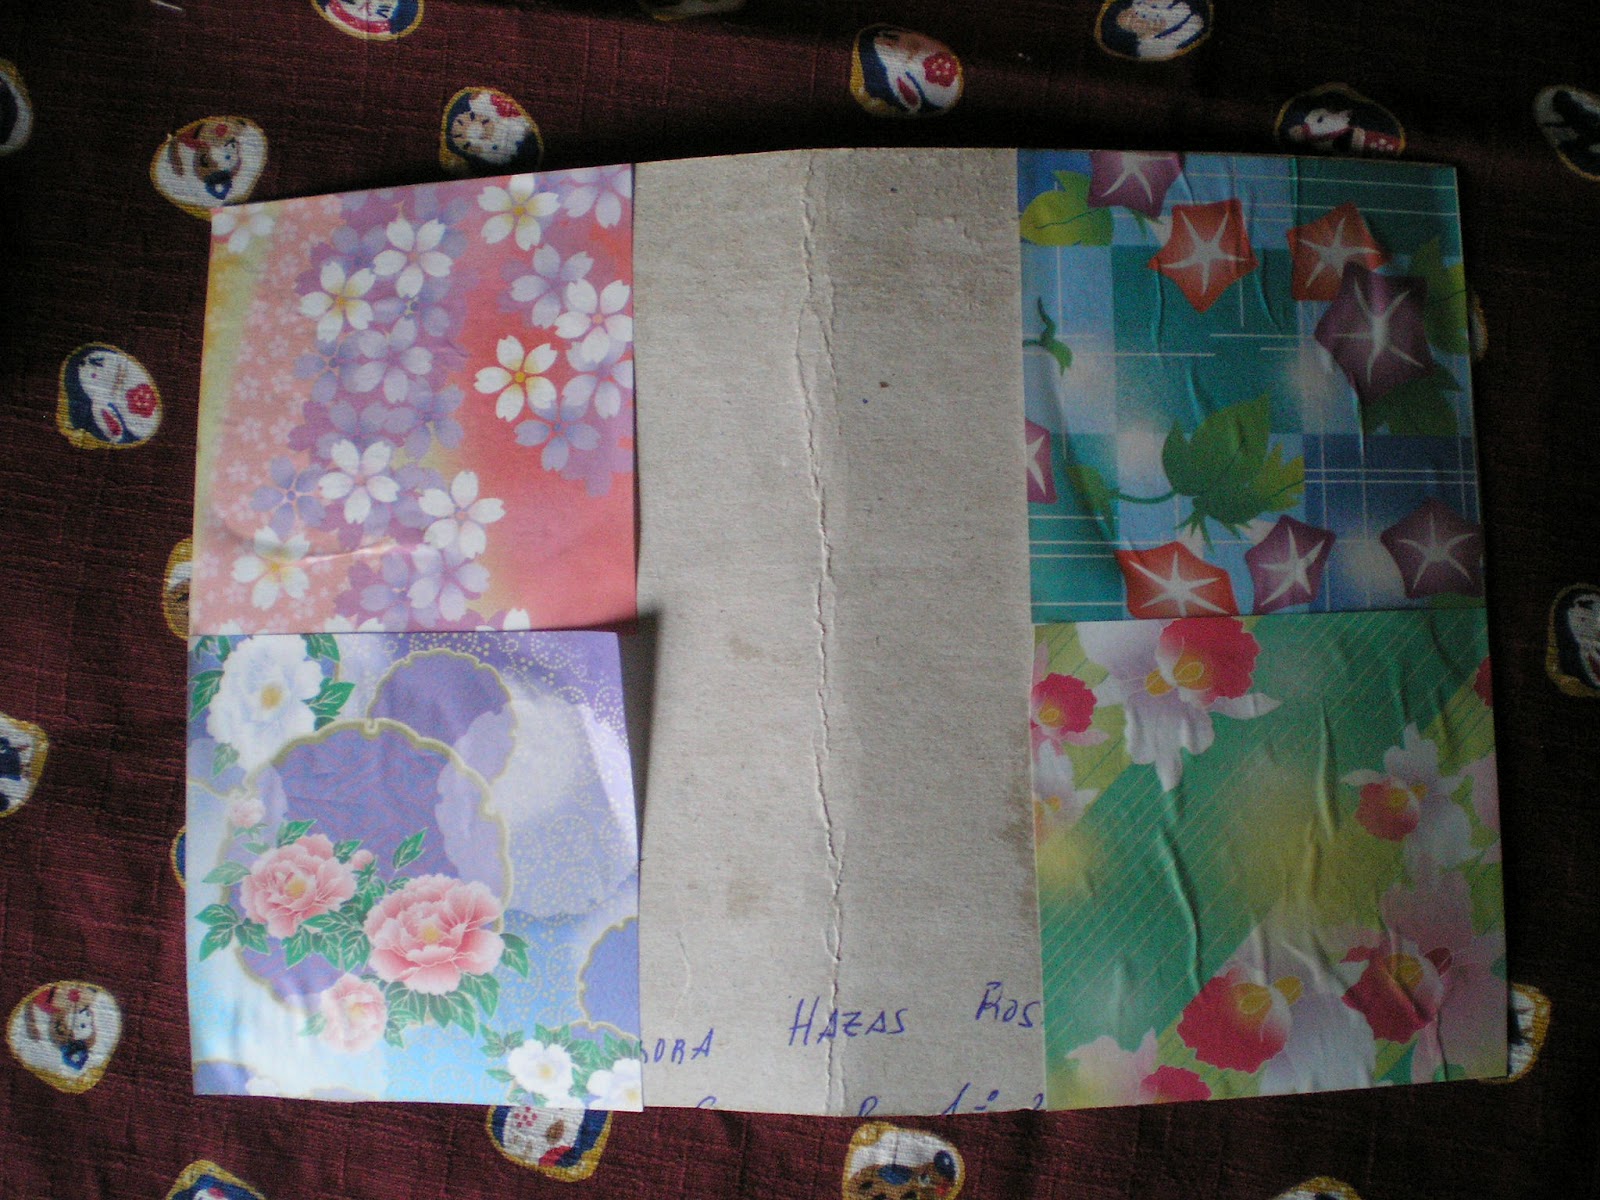
1. Cortar a la medida deseada las hojas del calendario y un trozo de cartón (si lo tuviera) para hacer las tapas.
1. Cut to the desire measure the sheets of the calendar and a piece of the carton (if it has) to make the cover.


2. Pegar los trozos de papel como más te guste.
2. Stick the pieces of paper as you like.


3. Coser las hojas y el cartón juntos por el centro con una aguja de lana y una hebra de lana.
3. Sewing the sheets and the carton together in the centre with a wool needle and a wool yarn.


4. Y ya está terminado. Si utilizáis una libreta de propaganda, simplemente tenéis que pegar las imágenes en la cubierta. Viendo como han quedado, esto podría haberlo hecho mi sobrino de 9 años y hubiese quedado mejor, así que es una buena idea para entretener a los niños una tarde aburrida.
4. And it's already finished. If you use the propaganda notebook, you just have to stick the images on the cover. Watching how it turned out, this could have been done by my 9 years old nephew and it would be better, so this is a good idea to entertain the children in a rainy afternoon.

Más inspiración del Moon Munkie Mistery Make:
More inspiration from The Moon Munkie Mistery Make:

martes, 7 de febrero de 2012

Sew grateful week tutorial

Sew Grateful Week

This is the first time I make a tutorial. I never thought I would make one. I'm very bad at giving indications in my own language, please excuse me if I miss something or I confuse the words.I don't think I have many skills that you, talented people, don't know yet. So I've decided to make a tutorial about something I learned recently by making a coat. I wanted to make loops, but I wanted them to be more rigid and looking in my books for tips I found this, but with less explanation and photographs. I hope it's useful.


Fold a piece of fabric on the bias
Dobla un trozo de tela al bies

Cut a strip about 3 cm
Corta una tira de unos 3 cm

You can use any cord you like, I found this in a 1 euro shop
Puedes utilizar cualquier cordón, encontré esto en una tienda de 1 euro

Cut the cord the double the length of the bias strip and pin the bias around the cord.
Corta el cordón el doble de la largura de la tira de bies y colócalo con alfieleres alrededor del cordón

Sew it with a zipper foot
Cosélo con un pie para cremalleras

Cut the seam up to 3 mm
Corta la costura hasta 3 mm

Sew the top opening of the bias to the cord
Cose la abertura del bies al cordón

Turn the bias over the cord to cover it
Da la vuelta al bies sobre el cordón para cubrirlo

This is how it looks
Así queda

Now you have your loop
Ya tienes tu presilla

Esta es la primera vez que hago un tutorial. Nunca pensé que haría uno. La verdad es que soy muy mala dando explicaciones, espero que me entendáis. No creo que tenga muchos conocimientos que vosotros, gente con talento, no sepáis ya. Así que he decidido hacer un tutorial de algo que aprendí hace poco al hacer un abrigo. Quería hacer presillas, pero quería que quedaran más rígidas y buscando en mis libros algún consejo, encontré esto, pero con menos explicación y menos fotografías. Espero que os sea útil.